Sorry for the lack of posts. Have been on vacation (still am) and spending time with family and away from technology which has been, lovely.
I thought I would do a little best of post to highlight some of my favorite finds from the past year. It being the first year of my blog and all ;)
1. Maybelline Color Tattoos. These have basically negated the need for me to ever purchase another paint pot. So great all around!
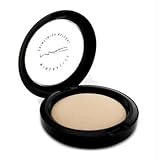
2. MAC Mineralized Skinfinish Natural. Not new this year but new to me. Have found super close dupes but nothing identical to this magic powder.
3. Seche Vite topcoat. Again, not new but I just discovered this stuff his year and can not live without it. Reduces drying time and leaves a salon like finish. Massively changed my manicure life.
4. Not Your Mother's hair care line. Probably the best drugstore hair products I have ever used. From shampoo and conditioner to styling products, super high quality at crazy affordable prices.
5. L'Oreal True Match foundations (Lumi and original). Hands down my favorite foundations of the year. Just amazing coverage, finish and a large range of shades. These have been my favorite discovery this year.
How about you? What were your favorite products from 2012? Happy New Year and thanks for reading my blog this year and joining me in this crazy little journey!
Pages
▼
Sunday, December 30, 2012
Friday, December 21, 2012
Holiday Nail Ideas
I usually just go for red or sparkly during the holidays but this year I felt a little more creative. I tend to do my nails twice a week and so I have had a few "Christmas" themed manis this month that I thought I would pass along.
I didn't have skinny nail polishes when I started so this snowflake ended up looking like a giant fail. But...I think the "idea" of it is still a good one and very festive, once you improve on your snowflake abilities. The gold is Sephora by OPI "Looks Like Rain, Dear". It's so pretty and sparkly but it is the WORST glitter polish to remove. The red is "Target Red" by L'Oreal.
I was definitely on a "snowflake" kick this year and really loved the effect on the nails, especially over glittery polish. First I did this green mani with just the glittery green nails. It's Wet n Wild "Sagreena The Teenage Witch" with Sinful "Call Me Later" glittery green topcoat. It was SO sparkly. It reminded me of The Grinch. I decided to try a better snowflake with the skinny nail brush and LOVED the look of it.
The next mani was an "icy" themed one. I wanted to try a sparkly snowman accent nail on glittery silver nails and I think it was one of my favorites. It was just so wintery and whimisical. I really loved it. I used Wet N Wild "Silvivor" with Nicole by OPI "You're A Star" on top which is silvery holo polish that just makes the nails glow. This mani lasted me 5 days before it started to even think about chipping. I think glitters are that way, they hold the polish better!
The one I decided to just go all out with the Christmas theme. I really loved "Sagreena The Teenage Witch" and I don't know when else I'll wear it if not at Christmas. So I did that on all of my fingers except my accent nails. Those were coated in 2 coats of "Target Red". I used a skinny nail brush to make white snowflakes on all the green nails. I then made the red nails look like Santa's suit. It is SO Christmassy!
Hope that gave you some ideas for your holiday mani!
I didn't have skinny nail polishes when I started so this snowflake ended up looking like a giant fail. But...I think the "idea" of it is still a good one and very festive, once you improve on your snowflake abilities. The gold is Sephora by OPI "Looks Like Rain, Dear". It's so pretty and sparkly but it is the WORST glitter polish to remove. The red is "Target Red" by L'Oreal.
I was definitely on a "snowflake" kick this year and really loved the effect on the nails, especially over glittery polish. First I did this green mani with just the glittery green nails. It's Wet n Wild "Sagreena The Teenage Witch" with Sinful "Call Me Later" glittery green topcoat. It was SO sparkly. It reminded me of The Grinch. I decided to try a better snowflake with the skinny nail brush and LOVED the look of it.
Hope that gave you some ideas for your holiday mani!
Monday, December 17, 2012
Mistletoe Makeup
Here is a list of the products I used:
1. Clinique Even Better Foundation
2. Revlon ColorStay Under Eye Concealer
3. Maybelline Instant Age Rewind Powder
4. NYC Sunny Bronzer
5. Clinique "Cupid" Blush
6. Sephora Waterproof Eyeliner in Glitter Green
7. Wet n Wild Comfort Zone Palette (3 green shades)
8. Urban Decay Naked Palette (Virgin as a highlight, Naked as a brow powder and Buck in the crease)
9. Maybelline Blackest Black Gel Eyeliner
10. L'Oreal Voluminous Mascara in Black
11. Benefit Prrrowl Mascara Topcoat (you can see the shimmer in some pictures)
12. Clinique "Merlot' lipstick
Friday, December 14, 2012
Easiest Red Lip...Ever?
I really love a good red lip. Especially this time of the year. It is just festive and brightens up your whole face. But...a good red lip usually takes some work and is more high maintenance than I like on a daily basis.
Until now.
I've talked before about how much I love the Revlon Colorburst Lip Butters. They are an amazing invention and if I could, I would own every color. I recently picked up Cherry Tart. Like Peach Parfait, Cherry Tart is one of the few Lip Butters that have some shimmer to them. Most are a cream finish.
This is just the easiest, low maintenance red lip I've ever worn. One swipe leaves a beautiful rosy flush to the lips. Two or three swipes leaves a gorgeous, wearable, red lip that feels like you are wearing nothing more than chapstick and actually leaves my lips feeling softer after application. You don't even need a mirror. Just swipe it on like chapstick and BOOM, beautimous red lips.
One of my favorite things about this particular type of red lip is that you don't have to worry about it wearing off oddly. When you use a red lip liner and do several rounds of blotting, reapplying, blotting, reapplying to get a good red lip, you can end up with an odd red ring around your lips by the end of the night. With something like a Lip Butter, it just evenly wears off and leaves a pretty rosy tint to the lips.
I find the wear time on Cherry Tart to be comparable to a regular Revlon lipstick but I enjoy the texture of the Lip Butters much more. It doesn't feel like a lipstick. It just feels like moisturized lips! With this kind of easy wear, I feel more comfortable wearing something a little more bold like a red lip during the day instead of feeling like it's a special occasion only kind of look. I can't say enough good things about Revlon Lip Butters!
Tuesday, December 11, 2012
L'Oreal True Match Super Blendable Makeup
I think I'm a foundation junkie.
That's the only reasonable excuse for my ever growing foundation collection. They just make so many different kinds with different finishes and coverages, I just can't resist.
I did have a real reason for buying, yet another, foundation. I'M PALE. All of mine were spring/summer colors and at least one or two shades too dark for me. So off I trudged. Walgreens was having a buy one get one sale on L'Oreal so I decided that since I love the L'Oreal True Match Lumi so much, I'd try the original True Match Super Blendable Makeup.
Gotta say...I'm impressed.
I really didn't think I would be. There's nothing about the "True Match" technology that really wows me. I don't think it automatically adjusts to your skin tone to match. I do think that they have a massive assortment of shades to match a large variety of skintones though and they are grouped nicely between Warm, Neutral and Cool tones to make it easier to find what you need. In the True Match Lumi, I was a C4 but with the original True Match I'm an N3.
I was a little wary when I saw that it's a pour top container. I absolutely hate those. Even more wary when I poured some out and saw how "thin" it is. It's a very runny foundation, which in my past experience has not equated nice coverage.
I decided to apply it with my hands the first time to really get a feel for the texture and how it applies on the skin. It almost has a powdery feel under the fingers, like a primer almost. One application and...completely different skin. Dab a little more in the areas that need extra coverage and they disappear. This stuff is definitely medium/full coverage foundation but in a way that doesn't look fake or mask like. Just covers what you need it to cover.
I set it with a loose powder because I get oily in my T-Zone. It's not a matte finish or a glowy finish, I'd say it's a pretty natural finish and lasts through a normal work day on me just fine.
Overall, I am pleasantly surprised with this foundation and will definitely be repurchasing! My sensitive skin has not broken out from it like I did with ColorStay.
I also think that L'Oreal has some of the best drugstore foundations and am very impressed with their products that I've tried. They are quickly moving up to one of my favorite drugstore brands!
That's the only reasonable excuse for my ever growing foundation collection. They just make so many different kinds with different finishes and coverages, I just can't resist.
I did have a real reason for buying, yet another, foundation. I'M PALE. All of mine were spring/summer colors and at least one or two shades too dark for me. So off I trudged. Walgreens was having a buy one get one sale on L'Oreal so I decided that since I love the L'Oreal True Match Lumi so much, I'd try the original True Match Super Blendable Makeup.
 |
| photo courtesy of lorealparis.com |
Gotta say...I'm impressed.
I really didn't think I would be. There's nothing about the "True Match" technology that really wows me. I don't think it automatically adjusts to your skin tone to match. I do think that they have a massive assortment of shades to match a large variety of skintones though and they are grouped nicely between Warm, Neutral and Cool tones to make it easier to find what you need. In the True Match Lumi, I was a C4 but with the original True Match I'm an N3.
I was a little wary when I saw that it's a pour top container. I absolutely hate those. Even more wary when I poured some out and saw how "thin" it is. It's a very runny foundation, which in my past experience has not equated nice coverage.
I decided to apply it with my hands the first time to really get a feel for the texture and how it applies on the skin. It almost has a powdery feel under the fingers, like a primer almost. One application and...completely different skin. Dab a little more in the areas that need extra coverage and they disappear. This stuff is definitely medium/full coverage foundation but in a way that doesn't look fake or mask like. Just covers what you need it to cover.
I set it with a loose powder because I get oily in my T-Zone. It's not a matte finish or a glowy finish, I'd say it's a pretty natural finish and lasts through a normal work day on me just fine.
Overall, I am pleasantly surprised with this foundation and will definitely be repurchasing! My sensitive skin has not broken out from it like I did with ColorStay.
I also think that L'Oreal has some of the best drugstore foundations and am very impressed with their products that I've tried. They are quickly moving up to one of my favorite drugstore brands!
Thursday, December 6, 2012
Revlon ColorStay Under Eye Concealer
How have I not known about this stuff?? I ran out of my usual under eye concealer and then also ran out of the CoverGirl that I was using instead. I found this on super sale at Walgreens and thought it was worth a try. I'm hoping the super sale doesn't mean they are discontinuing it, because it's...AMAZING.
I should have known based off of the ColorStay name that it would be great. I usually go a little lighter with my under eye concealer, just my personal preference on my face. However, since it was a sale the lightest they had was Light/Medium. I actually love the look of it. I thought it might be too dark but it matches my skin perfectly and creates such a nice look! Bright and awake without looking "fake".
It's creamy but way pigmented. I click it about 4 times and apply under each eye with the felt tip. I then use my ring finger to pat it in under the entire under eye area and into the corners of my eyes where I get the darkest.
True to ColorStay, it lasts all day. Once it "sets" (similar to the foundation) it doesn't move and it also dries which helps reduce smudging of your mascara. That's one of my biggest complaints about under eye concealers, I don't want them to stay "tacky" all day, it just turns into a magnet for all of your eye makeup.
I am really impressed with this ColorStay Under Eye concealer and will most definitely repurchase.
 |
| photo courtesy of revlon.com |
I should have known based off of the ColorStay name that it would be great. I usually go a little lighter with my under eye concealer, just my personal preference on my face. However, since it was a sale the lightest they had was Light/Medium. I actually love the look of it. I thought it might be too dark but it matches my skin perfectly and creates such a nice look! Bright and awake without looking "fake".
It's creamy but way pigmented. I click it about 4 times and apply under each eye with the felt tip. I then use my ring finger to pat it in under the entire under eye area and into the corners of my eyes where I get the darkest.
True to ColorStay, it lasts all day. Once it "sets" (similar to the foundation) it doesn't move and it also dries which helps reduce smudging of your mascara. That's one of my biggest complaints about under eye concealers, I don't want them to stay "tacky" all day, it just turns into a magnet for all of your eye makeup.
I am really impressed with this ColorStay Under Eye concealer and will most definitely repurchase.
Monday, December 3, 2012
November Favorites
Can you believe it's December?!?! It's going to be spring again before we know it. Holy Moly this fall just flew by. It's that time again for my favorites from the previous month. Here's what I couldn't stop using for the month of November!
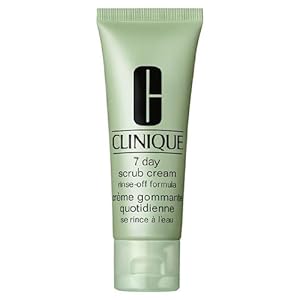
Clinique 7 Day Scrub Cream. I can't stop using this stuff. It's gentle but effective and leaves my face feeling super soft and glowing. LOVE love love this scrub!!
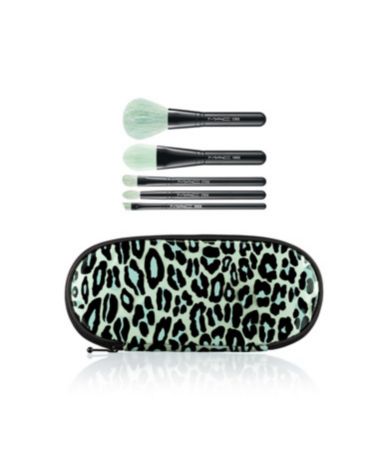
MAC Primped Out Essentials Perfectly Plush Brush Kit. I received this as a gift for my birthday and just adore it. The bag is pretty small and went into my makeup bag collection for travel, but the brushes are AMAZING. It's basically everything you need for an everyday makeup look. Foundation, powder/blush, eyeshadow, crease brush and the angled brush is what I use for powders on my eyebrows. Great little kit!
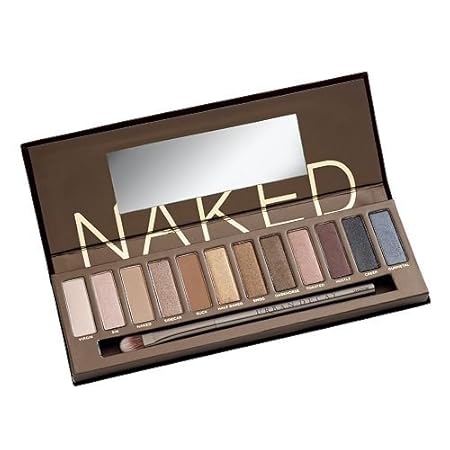
Urban Decay Naked Palette. I started using this again as fall rolled in and am pretty sure the love affair is going to last awhile. The colors are just SO perfect for this time of year and don't require much effort to get a great look. I've been using Sin and Buck together pretty consistently this last month and think with a black cat eye and red lips that would make a perfect festive makeup look!
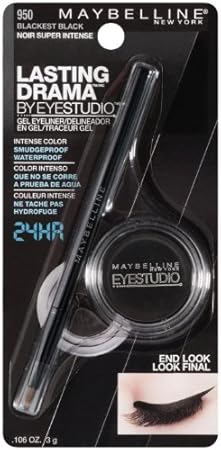
Maybelline Lasting Drama Gel Eyeliner. I've been on a gel eyeliner kick lately and this is the one I always grab. It just lasts all day and is so precise, but something about gel is a little bit softer than a liquid black eyeliner. I really like this formulation and think it's a great drugstore alternative!
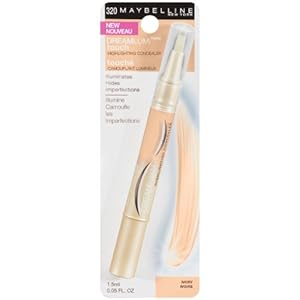
Covergirl Fresh Concealer. This was my go-to under eye concealer before I found the Maybelline Dream Lumi. I recently ran out of Maybelline and had a backup of this so started using it again. I just really love the look this gives and I think it does a great job of brightening my under eye area. It's a little bit less creamy than the Maybelline so I don't need to set this with anything.

Clinique Cupid Blush. What a gorgeous little pop of color. I am really impressed with this blush and haven't used anything else since I got it. It's a pretty neutral rosy pink and it just perks my face right up. It's so pretty! It's also very pigmented, which hasn't always been my experience with Clinique Blushes, but Cupid is exceptional!
Clinique 7 Day Scrub Cream. I can't stop using this stuff. It's gentle but effective and leaves my face feeling super soft and glowing. LOVE love love this scrub!!
MAC Primped Out Essentials Perfectly Plush Brush Kit. I received this as a gift for my birthday and just adore it. The bag is pretty small and went into my makeup bag collection for travel, but the brushes are AMAZING. It's basically everything you need for an everyday makeup look. Foundation, powder/blush, eyeshadow, crease brush and the angled brush is what I use for powders on my eyebrows. Great little kit!

Urban Decay Naked Palette. I started using this again as fall rolled in and am pretty sure the love affair is going to last awhile. The colors are just SO perfect for this time of year and don't require much effort to get a great look. I've been using Sin and Buck together pretty consistently this last month and think with a black cat eye and red lips that would make a perfect festive makeup look!

Maybelline Lasting Drama Gel Eyeliner. I've been on a gel eyeliner kick lately and this is the one I always grab. It just lasts all day and is so precise, but something about gel is a little bit softer than a liquid black eyeliner. I really like this formulation and think it's a great drugstore alternative!

Covergirl Fresh Concealer. This was my go-to under eye concealer before I found the Maybelline Dream Lumi. I recently ran out of Maybelline and had a backup of this so started using it again. I just really love the look this gives and I think it does a great job of brightening my under eye area. It's a little bit less creamy than the Maybelline so I don't need to set this with anything.

Clinique Cupid Blush. What a gorgeous little pop of color. I am really impressed with this blush and haven't used anything else since I got it. It's a pretty neutral rosy pink and it just perks my face right up. It's so pretty! It's also very pigmented, which hasn't always been my experience with Clinique Blushes, but Cupid is exceptional!
 |
| all photos courtesy of amazon.com |
Wednesday, November 28, 2012
Candy Shop Dupe
When my husband took me to see BD2, we had a little time to walk around the mall before the movie started. Which...I never do. I'm so not a mall person. I don't enjoy it, at all. I will park outside one store, run in and get what I need and leave. I never just walk around, perusing and sweating my face off in hot stores with millions of people. Not my bag, baby.
Anyway, we had time so I ran into Claire's. I've been looking for a sparkly cross bracelet and found one for $6 (score). I also checked out their nail polishes, which I've never done before either.
I actually found 4 that I really liked and they were on a BOGO 1/2 off sale. Nice, because at $5 a pop I would never have spent $20 on cheapo nail polish from Claire's.
But these ones were all sparkly topcoats and unique. The one I'm talking about today is Candy Shop. Which is an identical (right down to the name) blatant rip off of Deborah Lippmann's cult classic Candy Shop.
SEE HOW PRETTY?? It's all kinds of girlie glitters suspended in a pink jelly base. It's amazing. It's also $18 a bottle. Steep.
Claire's version is identical, and I got it for $2.50. Kind of a no brainer. I used Revlon Colorstay Cafe Pink as a base, which made it a brighter pink and used 2 coats of Claire's Candy Shop for my birthday mani. I think this would also be pretty over a pinky nude like Ballet slippers and super fun over a black or charcoal gray.

Topped with Seche Vite, I had no chipping or anything and it came off pretty well for a jam packed glitter. I have a few more of these Claire's glitter top coats I'll be reviewing. I would definitely repurchase the glitters, they have all been pretty decent and fun!
Anyway, we had time so I ran into Claire's. I've been looking for a sparkly cross bracelet and found one for $6 (score). I also checked out their nail polishes, which I've never done before either.
I actually found 4 that I really liked and they were on a BOGO 1/2 off sale. Nice, because at $5 a pop I would never have spent $20 on cheapo nail polish from Claire's.
But these ones were all sparkly topcoats and unique. The one I'm talking about today is Candy Shop. Which is an identical (right down to the name) blatant rip off of Deborah Lippmann's cult classic Candy Shop.
 |
| photo courtesy of allure.com
|
Claire's version is identical, and I got it for $2.50. Kind of a no brainer. I used Revlon Colorstay Cafe Pink as a base, which made it a brighter pink and used 2 coats of Claire's Candy Shop for my birthday mani. I think this would also be pretty over a pinky nude like Ballet slippers and super fun over a black or charcoal gray.

Topped with Seche Vite, I had no chipping or anything and it came off pretty well for a jam packed glitter. I have a few more of these Claire's glitter top coats I'll be reviewing. I would definitely repurchase the glitters, they have all been pretty decent and fun!
Tuesday, November 20, 2012
Clinique Long Last Soft Shine Lipstick in Merlot
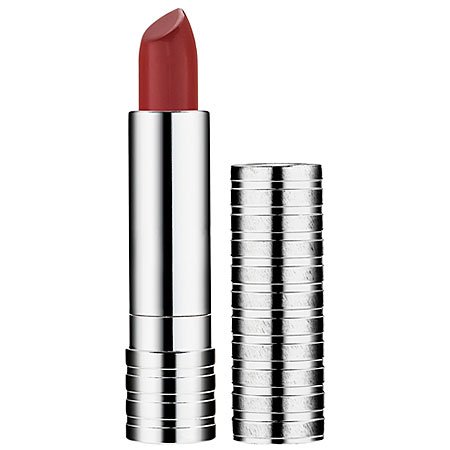
I may not be in love with Clinique's customer service right now, but I am totally in love with their lipsticks. Fizzy is one of my all time favorite lipsticks for autumn. I recently got Merlot and holy moly...it's beautiful!
It looks brick red in the tube, but it's a little more vibrant on the lips. It's a warmer red, not too purple and not too orange, just a very nice warm red. It's definitely a wearable red and perfect for the holiday season.
I love the way these lipsticks feel on. The color fades off slowly so you don't get left with an awful ring and they feel moisturizing and very comfortable on. You get a little shine and a lot of color in just a few swipes. I wear this without liner for a more casual red lip. You can wear it with a liner for a more precise finish, a little more of a statement lip.
Clinique Long Last Lipsticks are sold for $15 and are available wherever Clinique is sold.
Friday, November 16, 2012
At Home Highlights with Revlon Frost & Glow Kit
I loved the ombre but I was over it pretty quickly. I really only liked it when my hair was wavy. If I straightened it, the ombre just looked like grown out highlights. I wanted it to look effortless, not lazy. Big difference.
So I went darker and then highlighted myself. It's a good transitional autumn color. I really love it! I used the Clairol Professional Premium Creme Haircolor in 5NN. It took 2 bottles to get my whole hair covered. It was DARK. Which I liked but wasn't the result I was going for.
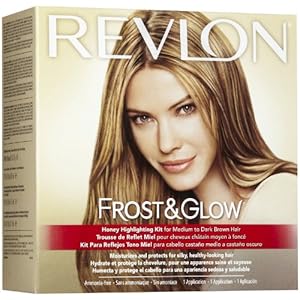
I let that simmer down for about a week and then used a Revlon Frost & Glow Honey Highlighting Kit for Medium to Dark Brown hair. They also have a kit for lighter hair. I prefer the Honey kit, even when my hair is super blonde.
I have honestly been using the Frost & Glow kits since I was about 16. It's the only drugstore highlighting kit I ever use. I've used it on myself, friends, family and even was paid to do a teachers hair in high school. This kit is seriously fool-proof, provided you follow a few simple steps. Here's the method I use to get great results every time.
1. I always highlight on second day hair. I feel like it just works better. Maybe the oils protect my scalp a little more or something, but I never highlight freshly washed hair.
2. I part it down the middle, even though that's not my regular part. This step ensures even distribution of the streaks throughout your hair, regardless of where you normally part.
3. I brush my hair really well and put the cap on as tightly as I can stand. This prevents leakage into the cap.
4. I pull the streaks through every single hole in the cap. There are markings on the cap that you can follow for different effects but I've had the best luck using every hole.
5. After all the streaks are pulled through the holes, I take a brush and brush all the streaks really well. Make sure all the little loops are pulled through near the roots to ensure your streaks are solid. I also put all the hair that is not pulled through the cap into a low pony tail in the back once I am done. This helps prevent any bleach from falling into the hair not being bleached.
6. I start with the bleach in the back as it is usually the darkest and needs the most processing time. I do it in about one inch sections and pull the bleach through the ends first and then work closer to the roots. DO NOT EVER put the bleach straight on the cap. The bleach will puff up as it heats up from processing and WILL bleed through the holes. You want the bleach away from the scalp and off the cap as much as possible. Don't be concerned with getting close to your roots, a little space will give you better results and will avoid spotting. This is the most important step, bleach on the cap will give you leopard spots...EVERY SINGLE TIME.
7. As I complete each section, I loosely clip it with a small plastic claw clip. Don't pile it on your head, again...this will create bleeding. Clip it loosely to keep it from tangling with the other sections and to keep the bleach from dripping, but don't clip it on top of your head.
8. After all the sections are done, gently put the provided plastic cap on and seal with a plastic claw clip on your forehead.
9. I know my hair is done processing when the streaks turn a very pale yellow while under the plastic. It generally takes 30 minutes of processing for ME, but everyones hair is different. Don't make the common mistake of removing when they look orange. The bleach is still lifting. Wait until you get that pale butter shade and then rinse.
10. The shampoo and conditioner provided is enough to wash about 1/8th of my hair. Use your own shampoo and a nice deep conditioner. This is bleach afterall and will damage your hair somewhat depending on it's condition. I always deep condition after bleaching.
Here's my hair before Frost & Glow...
And here's my results...
Thursday, November 15, 2012
100th Post!! My Dream Makeup Kit
It's my 100th post here on Lovely Dalliances. YAY!
I thought it would be fitting to do a fun post. I love a lot of things, but if I had to pick only one kind of each item, these are the ones I would absolutely HAVE to have. Holy Grail, money is no obstacle kind of "Dream Makeup Kit".




What's in your dream makeup kit?
I thought it would be fitting to do a fun post. I love a lot of things, but if I had to pick only one kind of each item, these are the ones I would absolutely HAVE to have. Holy Grail, money is no obstacle kind of "Dream Makeup Kit".
1. Foundation- Make Up For Ever Mat Velvet +

2. Concealer for blemishes- MAC Studio Finish Concealer
3. Concealer for under eyes- Maybelline Dream Lumi
4. Powder- MAC Mineralize Skin Finish Natural
5. Bronzer- NARS Laguna

6. Blush- Tarte Amazonian Clay Blush in Glisten

7. Highlighter- Too Faced Candlelight

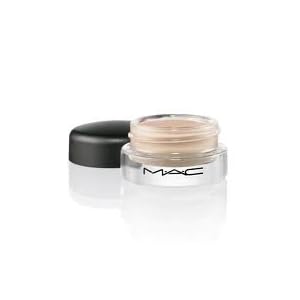
8. Eye Primer- MAC Paint Pot in Bare Study

9. Eyeshadow- Urban Decay Naked Palette

10. Eyeliner- Lancome Art Liner

11. Mascara- Lancome Hypnose (original version)

12. Lipgloss- BareMinerals in Cupcake

13. Lipstick- Tarte Glamazon in Inspired

14. Brow- Anastasia Brow Wiz in Medium Ash

15. Brush Kit- Real Techniques (every single brush!)
What's in your dream makeup kit?
Tuesday, November 13, 2012
Simply U Shampoo Review
I am so mad. I can't find Not Your Mother's shampoo or conditioner at any of my Walmarts anymore. They have all the other products but Way to Grow isn't even listed on the shelves anymore. I don't know what's up but I hate it. This was my holy grail, completely in love with shampoo and conditioner set.
I was completely out of shampoo and needed something moisturizing and sulfate free. This Simply U Sulfate and Paraben Free Moisturizing Shampoo was right on the shelf next to the NYM stuff so I grabbed it.
Big mistake.
It is what I usually expect from a sulfate free shampoo. Little suds, hard to rinse out and leaves my hair a tangly mess. It also leaves my ends feeling like straw. For a moisturizing shampoo, this is the worst shampoo I've ever tried. I'd hate to see what the other versions do if this one is that drying. My hair literally felt crunchy. I thought I'd used too much or too little so I gave it another try. Nope, my hair just really hates this shampoo.
I don't know if this is Walmarts attempt to try to sell something similar to NYM, but this is definitely a dud in my opinion. It's more expensive than NYM, it's in an awkward giant bottle with a pump instead of the easy flip top tube and the worst part, Simply U smells like grandma shampoo. You know that powdery, musty smell that a lot of products geared toward an older clientele? Not a fan. I miss my Way to Grow and am upset I'm going to have to order it online now. BOO.
This is one product that has offended me so much that I wouldn't even waste my money trying ANYTHING else in their collection. It takes a lot for me to diss a product, everyone is allowed one dud but this is just a worthless shampoo for me. One I definitely would not repurchase.
 |
| photo courtesy of simplyubeauty.net |
Friday, November 9, 2012
Holiday Wish Lists and Gift Ideas
It's that time of year for birthday and holiday wish lists. I've been perusing my favorite makeup and girlie goody websites for this season's gift sets and found a couple of things I wanted to pass along. They would make great gifts for your best girlfriends, nice presents from the man in your life or just awesome things to treat yourself to after a long hot day of shopping for everyone else at the mall!Happy Shopping!
1. Sephora by O.P.I. Tinsel Town collectors set. This includes 16 mini nail colors plus a full-size jewel top coat. These products are worth over $90, but this is available at Sephora for $49.50.
 |
3. Too Faced "Love Sweet Love" set. As always, Too Faced does some of the best themes and packaging with their holiday sets. This is adorable and fairytale themed. It comes with Shadow Insurance, Primed and Poreless, Perfect Eyes eyeliner, LashGASM Mascara, Face Brush, 6 eyeshadows, 2 blushes, 2 lipglosses and a travel bag. These products are worth $163, but this is available at Sephora for $46.

4. Tarte "Carried Away" collectors set. This is probably one of my favorites just for the sheer amount of products you get. This includes an Amazonian Clay blush, Amazonian Clay finishing powder, 8 Maracuja lip glosses, Lights, Camera, Lashes! Mascara, Face Brush, 24 (yes...24) Amazonian Clay eyeshadows and a cute bag! These products are worth over $512 (!!!!), but this is available at Sephora for $54.
5. Sephora "Glitz and Glam" Party Sampler. This is a great way to try products from several different brands in an affordable way. This sampler includes Stila Duo Shimmer Powder, Laura Mercier Baked Eye
Color, bareMinerals Eyecolor in Good
Fortune, SEPHORA by OPI Nail Colour,
Josie Maran GOGO Instant Natural Volume Argan Mascara, Nars Body Glow, Lorac 3D Liquid Lustre Gold, Bare
Escentuals Marvelous Moxie Lipgloss, Stila Smudge
Stick Waterproof Eye Liner. Products are worth over $133, but this is available at Sephora for $45. |
| all makeup kit photo's are courtesy of sephora.com |
That's it as far as makeup is concerned, but I did manage to find a few other things I thought would be great things to put on your wish list or ideas for that hard to buy girl in your life!
6. Nordstrom's Make + Model Pattern Thermal Pajamas. Who doesn't like getting fresh new jammies? These ones from Nordstroms are SO CUTE. I love that they don't look like frumpy dump jammies but still look so soft and cozy. They come in 4 different patterns and are available at Nordstrom's for $48.
 |
| photo courtesy of nordstroms.com |

 7. Lush "Rosie" gift set: I think Rose is one of those classic scents that almost everyone likes if it's done correctly. Lush does Rose well. It's not grandma scented Rose, it's a true Rose scent. Floral, feminine and sweet. This cute set from Lush contains Rose Jam Bubbleroon, Rose Queen Bath Bomb, Amandopondo bubble bar and Ro’s Argan Body Conditioner.
This is available from Lush for $29.95.
 |
| photo courtesy of lushusa.com |
8. Lemon Kissed 3 Month Jewelry Club Subscription. This girl makes some of the most awesome jewelry I've ever seen and she's fantastic. Her prices are affordable, the jewelry is amazing and I think this subscription is the cutest idea. Each month, for 3 months your friend (or you!) will recieve 1 jewelery item (of the seller's choice) sent directly to you. One suprise ring, one suprise pair of post earrings and one suprise pair of dangle earrings. For only $38. With FREE SHIPPING!! Visit www.lemonkissed.com to see all of her pretties!
 |
| photo courtesy of lemonkissed.com |
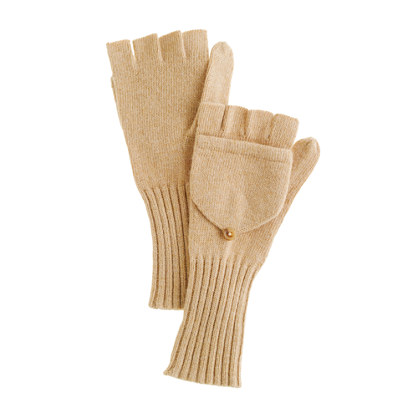
9. J.Crew Wool Angora "Glittens". Anyone with an IPhone knows how important a good pair of glittens are. You need your finger tips!!!! Kind of hard to do in freezing weather. Glittens keep your hands warm and your fingertips available for your phone use. I am always on the hunt for a cute pair of these babies and these Wool Angora ones from J.Crew are fab. Not only are they practical and soft but they have a longer wrist to keep them from creeping out from under your coat. What a thoughtful little luxe gift! These come in 5 different colors and retail for $29.50.
 |
| photo courtesy of jcrew.com |
10. Cherry Blossom Stationary Set. This SUPER CUTE stationary set from Papyrus comes packaged in a beautiful matching wooden box. It comes with 20 notecards and 20 matching envelopes. Who doesn't like stationary!? It's one of those things that's so lovely to have but no one ever buys for themselves. This cute gift is available in 6 different patterns, but the Cherry Blossom was my favorite. It's available for $32 from papyrus.com.
 |
 |
| photos courtesy of papyrus.com **I am not affiliated with any companies mentioned and was not paid for any mention of any company listed. Purely my own opinions.** |


